You know those slam-dunk recipes – the ones that are super easy, a little unusual, and that everyone raves about? This is one of those!

You know those slam-dunk recipes – the ones that are super easy, a little unusual, and that everyone raves about? This is one of those!

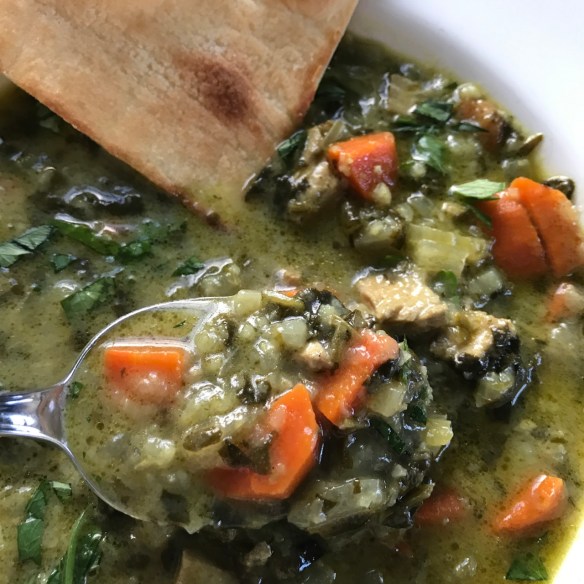
Crafty wordplay aside (Get it? Wedding/Bliss?), you might be wondering if a meatball could really be blissful? Darn good, maybe – but blissful? Hardcore carnivores might not agree, but I think these lean turkey meatballs – laced with parmesan cheese, deliciously caramelized outside and spoon-tender inside – are about as good as a meatball can get. They’re the newest addition to our family’s “Favorites” list – whether added to this healthy meal-in-one soup, served with spaghetti and tomato sauce, or eaten straight from the pan.

So is it a curry or a chili? Exactly. This one-pot wonder can be whatever you want it to be – it’s all in the marketing. For example, if you’re serving to kids or vegetable-phobes, do not call it “Chicken Curry Chili with tons of tomatoes, garbanzo beans and winter squash”; “Chicken Chili” might be a safer bet. Or build a campaign around the secret ingredient: peanut butter.

Got leftover corned beef and need a break from sandwiches or hash? Try adding it to these quick drop biscuits – no kneading or rolling required. Along with a pot of cauliflower soup, it’s what’s for dinner in our house tonight.

Everyone in our house grooves on crispy roasted broccoli, so it’s in heavy rotation on the dinner menu playlist.

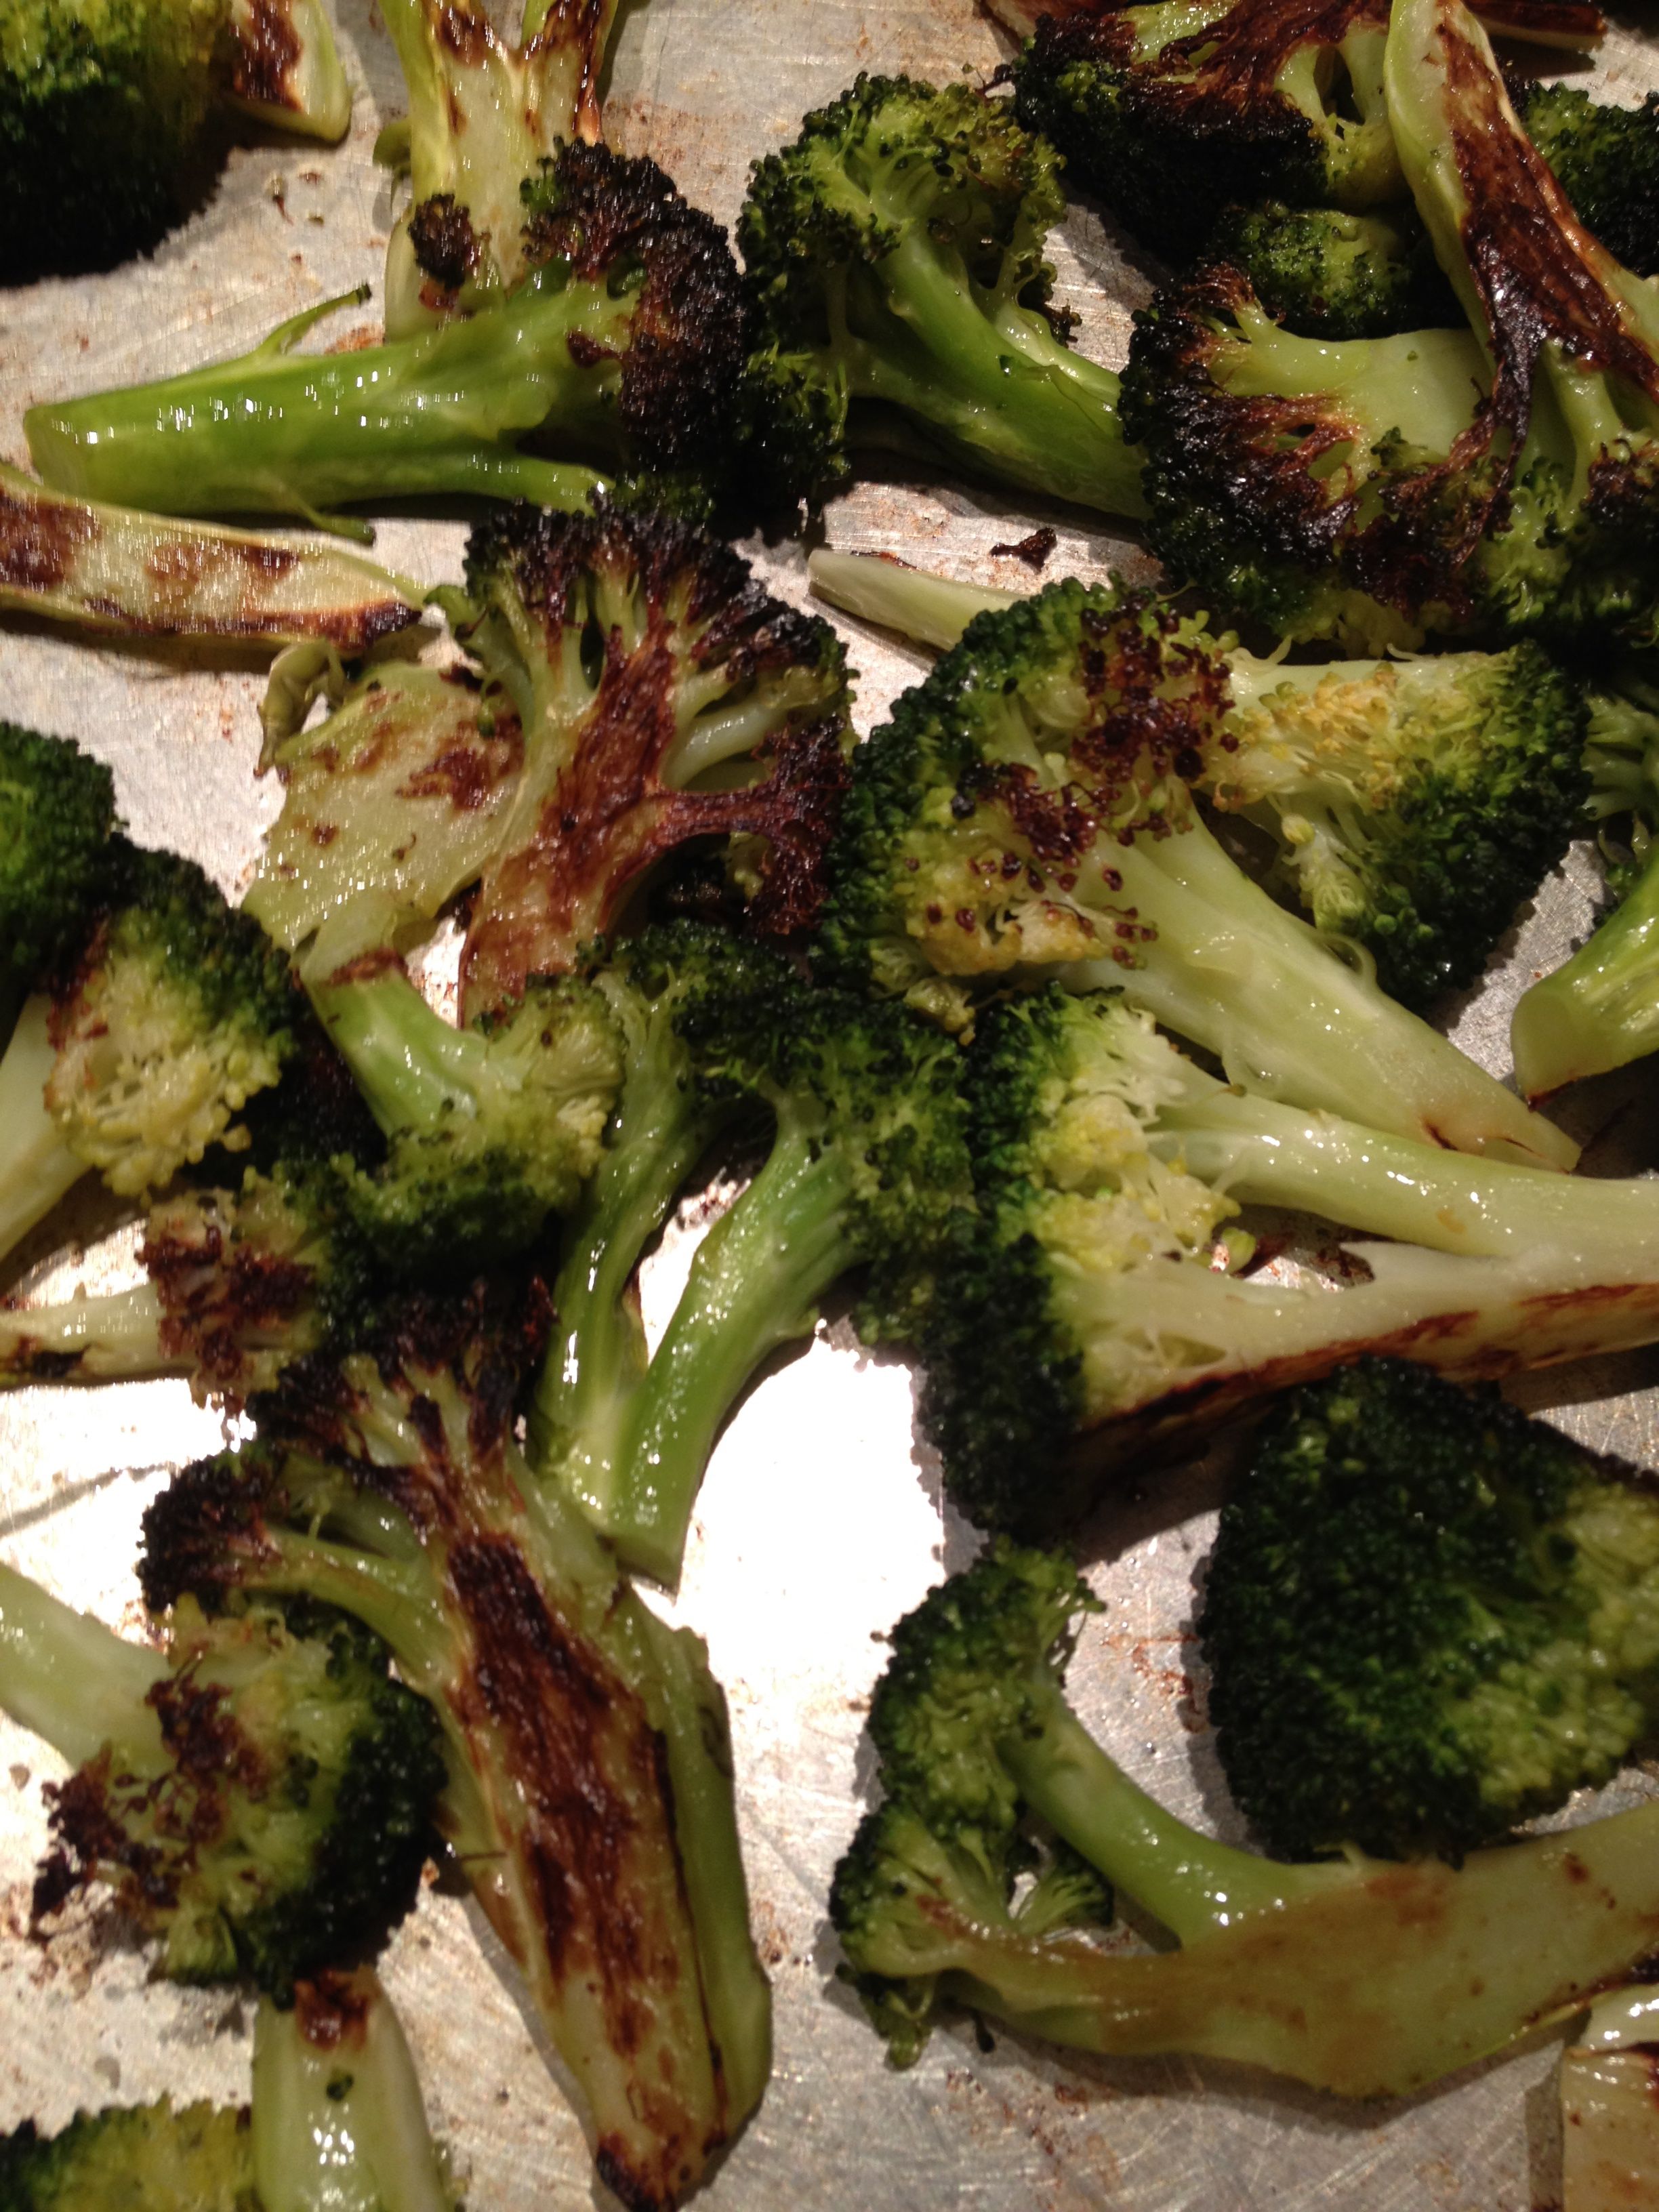
However, no one but me will eat the stems or stalks. I’m not really sure why this is, but I’d guess it’s because the florets get so much crispier than the stalks. Whatever the reason, I end up with pounds and pounds of broccoli stalks that I can’t bring myself to throw out. (We had to stop putting food in our backyard compost pile because the rats and raccoons thought they’d stumbled upon a 24/7 gastropub.)

So now, whenever I make roasted broccoli, I chop up the underappreciated stems and store them in a gallon-size ziplock bag in the fridge. (They’ll keep for weeks.) When the bag’s full, it’s time to make Cream of Broccoli soup.

OK – technically speaking, this soup has 96.5 calories per serving (still a bargain), but since you can burn 100 calories by cooking for 34 minutes, this soup nets you zero calories. That’s my kind of math! (Similar to “subscribe and save 80% off the newsstand price” or “buy 2 pairs of shoes, get the 3rd pair free”; how can you go wrong?)
(Calorie information is from sparkpeople.com. I was excited to learn that you can also burn 100 calories by rearranging furniture for 14 minutes – finally justification for one of my favorite pastimes!)
Besides having “zero” calories, this soup 1) tastes rich and complex, 2) is gluten and dairy-free, and 3) contains four types of vegetables but no one will ever know. (We have some vegetable-phobes in our house.) And – like any pureed soup, it can also be dressed up for Halloween with a sour cream spider web. This will up the calorie count a little, but will keep the attention away from the exact contents of the soup. (I called it Mystery Soup.)


Myrtle, my maternal grandmother, made a killer chicken pot pie. Essentially a chicken stew with a pastry crust, pot pie is at once the ultimate expression of love and the ultimate way to use up leftovers. (Two things near and dear to Myrtle’s heart.) Myrtle’s pie crusts were always perfectly light and flakey, and most of the time she’d make just the tops for everyone’s individual pies; why bother with bottom crusts which would just get soggy from the filling? Indeed! Myrtle also loaded her pot pies with vegetables from her Hood Canal garden, which was about three times the size of her kitchen. She was doing “organic,” “local” and “seasonal” way before it was trendy.

Myrtle Seeley Langlow
A true romantic, Myrtle would be thrilled to know that my husband credits our engagement to her chicken pot pies. As a thoughtful (and some might say calculated) gesture, I used to make 3 or 4 pot pies at a time for him while we were dating; he’d keep them in his NYC freezer for a midweek respite from General Tso’s take-out.

Many blissful years later, Myrtle’s symbols of love wrapped in pastry still elicit warm emotions. In fact, I’m thinking of making them for this year’s Valentine’s Day dinner. (Maybe I’ll save the Nordstrom bill discussion for afterwards . . .)
Chicken Pot Pie
Over the years I’ve made some tweaks to Myrtle’s recipe – adding some additional flavorings to the sauce, swapping out some of the vegetables, making the pastry with butter instead of Crisco, and sometimes baking the pastry tops separately. Feel free to make your own modifications, including the use of ready-made pastry dough or puff pastry if dough-making is a deal-breaker.
Homemade pastry crust might sound intimidating, but it’s truly simple! (Especially if you use a food processor.) Depending on your ambition or your mood, you can either cook the pastry tops on top of the filling in ovenproof bowls or ramekins, or bake the tops separately on a parchment-lined baking sheet. Ovenproof bowls are not required for this method and assembly is somewhat easier; the pastry crusts also get crisper. Examples of both methods are shown below.
Make the crust:
(Makes enough for about 8 individual pie tops or two 9” pies; freeze unused dough if you’re making a single batch of filling.)
In the bowl of a food processor, combine flour and salt; pulse to mix. Add cubed butter and pulse until mixture resembles coarse crumbs. Add the water and pulse until dough sticks together when pinched. (You can do this without a food processor; follow the same steps, but instead of pulsing use a pastry cutter or 2 butter knives to cut in the butter.)


Form dough into 2 discs (I use plastic wrap to help the dough come together and contain the mess.) With a sheet of parchment paper below and a piece of plastic wrap on top, roll out a dough disc to about 1/8” thickness. Using intended serving bowls as a guide, trim dough to fit. (Flush to edge for pre-baked method or with a ½”+ overhang for the bake-together method.) Gather excess dough and repeat until you have enough tops made. Cut out a small shape or initial if desired. (Freeze any leftover dough.) Place dough tops in refrigerator until ready to bake tops or assemble pies.
For pre-baked (cut to shape of serving bowl):


For baked-together (cut to shape of ramekin with 1/2″+ overhang:


Preheat oven to 425ºF.
Prepare the filling:
(Makes 4-6 individual pies, depending on size of bowls; recipe can be doubled if you have a large enough pot!)
Poach the chicken: (Skip these steps if using precooked/leftover chicken.)
In Dutch oven or heavy saucepan over medium heat, add raw chicken breasts, chicken stock, thyme & bay leaf (if using) and bring to a simmer. Add any uncooked vegetables that you’d like to add to the pot pies. (Carrots & cut green beans were added here.) Simmer gently for about 15 minutes, or until chicken is no longer pink in the center. Remove from heat. Remove chicken with tongs and set aside to cool. When pan is cool enough to handle, pour stock through a colander or strainer into a large (4-cup minimum) measuring cup or bowl. Discard bay leaf. Wipe pan dry with paper towel.


Make the sauce:
In same Dutch oven or heavy saucepan over medium heat, combine butter and onion (or shallot), and celery if using, and cook until soft and translucent (about 5 minutes). [Add thyme if using leftover chicken.]

Add flour and cook for another minute or two. Stir in sherry or white wine (will form a thick paste).


Stir in reserved chicken broth 1 cup at a time; whisk until smooth. (As smooth as can be with the bits of onion and celery.) Whisk in salt or bouillon cube, pepper and milk; add chicken and simmer over medium-low heat until sauce is slightly thickened. [Sauce should have a gravy-like consistency.]

Unless you are creating individual custom pies (i.e., carrots in some but not others), add the cooked and/or frozen vegetables to the sauce and simmer until heated through. Taste sauce for seasoning, adding an additional pinch of salt if necessary. At this point, the filling (or stew) is ready to serve if you are using the pre-baked tops method.

For custom-vegetable pies, distribute the vegetables among pies as desired.

Example of custom vegetable option
For pre-baked tops method:
Remove dough tops from refrigerator. Bake on parchment-lined baking sheet (at 425ºF) for 15 minutes or until pastry is golden brown. Let cool on baking sheet. When ready to serve, ladle hot filling into bowls and carefully top with cooled pastry crusts.


For baked together method:
Remove dough tops from refrigerator. Ladle filling into ovenproof bowls/ramekins. (You can fill six 4-oz or four 6-oz ramekins with a single batch.) Place on top of filled ramekins, turning under extra dough and crimping edges. (Cut steam vent slits in top of pastry if not doing cut-outs.)
Place pies on a baking sheet and bake at 425ºF for 20 minutes or until pastry is golden brown and sauce is bubbling. Allow pies to cool 5-10 minutes before serving.


For homemade frozen pot pies:
Add filling to mini aluminum loaf pans and top with unbaked pastry dough. Seal/crimp edges and cut steam vents. Freeze in a plastic freezer bag. Whenever ready to bake, heat oven to 425ºF and bake frozen pie for 45 minutes – 1 hour or until golden brown and bubbly.


Few things are better on a cold January day than hot soup and biscuits. Except maybe this soup and these biscuits.


I call it a chowder because of the bacon, potatoes and cream, but it’s really just fancied up chicken soup. (That tastes nothing like chicken soup.) Fresh rosemary is really key here; most of the other elements can be modified to suit your taste, cupboard ingredients or Points plan. (I.e., use an onion or shallots instead of the leeks, or make a flour/butter/milk roux instead of using the cream, or add more or less potatoes or corn, etc.) Serve with large napkins and anticipate slurping.
Corn & Leek Chowder with Fresh Rosemary
Serves 6-8
Cut dark green tops off of leeks and discard (or wash and save for making homemade stock, or add to the compost pile, or shred and dehydrate for homemade Easter grass). (That started out as a joke, but now it’s got me thinking. . . ) Cut leeks in half lengthwise, then cut into ½” slices crosswise.

Add sliced leeks to a bowl of cold water and swish around to rinse. (Sand and grit will fall to the bottom of the bowl.) Carefully remove rinsed leeks to a lettuce spinner basket or colander. Repeat if the leeks were especially sandy.
In large Dutch oven or stockpot over medium heat, cook bacon until crisp. Remove with a strainer or slotted spoon and drain on paper towels; set aside for garnish.


Add chopped leeks to bacon grease left in pan (There should be about 1 Tbsp, but if the bacon is extra lean you may need to add a little olive oil.)

Sauté leeks until softened and starting to caramelize, about 10 minutes. Add rosemary and sauté one minute more.

Add wine to pan and use a wooden spoon to scrape up any browned bits at the bottom of the pan. Add chicken stock, corn, bouillon cube, potatoes and sugar to pot. [Here I go with the bouillon cube again; bouillon cubes are just handy packets of salt with a little extra flavor boost; feel free to use 1 teaspoon of kosher salt or a spoonful of “Better Than Bouillon” instead.]

Reduce heat and let simmer uncovered until potatoes are tender. Stir in cream. Add freshly ground black pepper and kosher salt to taste (a little pinch at a time, and keep tasting until it tastes good to you.) If you want a thicker soup, smash a few of the potato cubes against the side of the pot and stir to incorporate the potato starch. Garnish with reserved crumbled bacon.

Can be made several days ahead. In fact, tastes better if made several days ahead. If soup becomes too thick, thin with a little milk or chicken stock.
Easy Cheesy Drop Biscuits
Adapted from a 1999 Bon Appétit recipe for Cheddar and Stilton Drop Biscuits
Preheat oven to 400°F. Line 2 large baking sheets with parchment paper. Add first 6 ingredients to food processor and pulse until mixture resembles coarse meal.

Add cheese(s) and pulse again. Transfer mixture to large mixing bowl.


Blend buttermilk (or reduced fat sour cream and milk mixture) and egg in the liquid measuring cup. Add to flour mixture, stirring just until dough is moistened.

Using a small ice cream scooper or spoon, scoop approx. ¼ cup of dough for each biscuit and drop onto parchment lined sheets (2 apart). [Sorry – forgot to take a picture of this step, but it’s a lot like making cookies.] For best results, chill in refrigerator for an hour before baking, (Or chill overnight; you can load them all onto one baking sheet for chilling and then space out onto 2 sheets for baking.) Bake biscuits 20 minutes, rotating sheets halfway through baking. (Worth doing even if you have a convection or true convection oven.)

Can be made several days ahead and warmed in a low oven.
Makes about 2 dozen mini biscuits.

With the holidays right around the corner, my daughter’s birthday on Wednesday and my mother-in-law coming to stay for the weekend, a four-letter word comes to mind. Soup.
Quick, nutritious and versatile, soup is a one-pot solution for holiday entertaining and family-feeding stress. With a big pot of soup in the fridge, and/or some containers in the freezer, you’re set for just about anything. Like the perfect LBD, soup can be dressed up or down to suit any occasion; serve it in big mugs with grilled cheese sandwiches for a casual lunch, or serve it in fine china teacups as an elegant and not-too-filling appetizer for a holiday meal. My mother-in-law will be very impressed to be served a soup course, as if we were on the Queen Mary (or Titanic); she doesn’t need to know I just pulled it out of the freezer.

Fresh fennel may not be a regular staple in your produce bin, but this soup is a good reason to go out and buy a couple of bulbs. (Look for ones that are firm, with fresh leafy tops.) By pureeing the fennel, onions and tomatoes, you end up with a beautiful, “sippable” soup with good body and a delicate flavor – but looks like regular tomato soup. The fennel can be your little secret.
Tomato Fennel Soup
Adapted from The Silver Palate Good Times Cookbook, by Julee Rosso and Sheila Lukins
Cut the tops from the fennel bulbs and reserve some of the leafy tops for garnish.

In large pot or Dutch oven over med-low heat, add the chopped fennel, onions and butter and cook until the vegetables are limp. Add the garlic and cook for another minute or two. Season with 1 teaspoon kosher salt. 
Add the tomatoes with their liquid and simmer uncovered for about 20 minutes. (Now would be a good time to prep the gruyère dippers/croutons.)

Add the Pernod, chicken stock, bouillon cube and a few grinds of black pepper. Using an immersion (stick) blender, pulse/puree the soup right in the pot until smooth. (Alternatively, do this in batches in a blender once it’s cooled a little.) Stir in cream and sugar. (This helps balance the acidity of the tomatoes.) *Note: The anise liqueur really helps highlight the flavor of the fennel, and it also adds sweetness. If you choose to omit it, you should add another teaspoon of sugar.)

Now is time for the most important step: Tasting and adding salt. Add kosher salt – tasting and adding ½ tsp at a time, up to 2+ teaspoons until it tastes good to you. [Salt is the SECRET to great-tasting soup. If you’ve ever made a soup that just didn’t taste like much, it needed more salt.]

Serve with chopped fennel fronds for garnish, if desired. Keeps for several days in the refrigerator, or for months in the freezer.
8-12 servings, depending on portion size.
Gruyère Dippers
If you can plan a day ahead, slice the baguette and leave out overnight to dry out. This will save a step.

Otherwise, arrange in one layer on a baking sheet and toast in a 350ºF oven until dry/crisp. Drizzle olive oil over toasted slices, tossing w/hands to coat. (Will not be evenly covered; it’s OK.)

Sprinkle grated cheese over slices and bake at 350ºF for about 15 minutes, or until golden brown. Remove from oven and let cool on baking sheet.


Break apart when cooled. (Eat the crispy cheese bits that stick to the baking sheet.) Store in an airtight container, in pantry or freezer.
